I just installed Openbox on my laptop running Ubuntu. When I clicked the web browser menu item, it opened Konqueror. Since this is not my preferred browser, I ran
sudo update-alternatives --config x-www-browser
It provides an interactive way to choose which browser opens when you run x-www-browser.
Monday, October 27, 2008

Tuesday, October 14, 2008
Using Gmail as the default mail client in Ubuntu
I finally got annoyed with Evolution opening up every time I clicked a mailto link in Firefox. So I did a little Googling and came up with this:
- Create a script in your home directory. I put it in ~/scripts and called it mailto.sh.
- As of today, this script works with Firefox 3.0.3:
#!/bin/sh
firefox "https://mail.google.com/mail?view=cm&tf=0&ui=1&to=`echo $1 | sed 's/mailto://'`" - Make the script executable:
chmod u+x ~/scripts/mailto.sh
(or a+x if you want to allow all other users to run it) - Go to System → Preferences → Preferred Applications.
- Set Mail Reader to Custom, and enter the path to the script.
Saturday, October 11, 2008
Oh, Brother
My Brother HL-2070N laser printer had been printing documents as though they were on A4 paper, despite the size being set to Letter in the CUPS configuration. After considerable Googling, I came up with the answer. I had to edit /usr/Brother/inf/brHL2070Nrc. I changed the PaperType variable to Letter. Everything prints properly now.
Sunday, September 23, 2007
Refreshingly Simple: SyncMastery Achieved
About a week ago, I noticed that my monitor, a Dell 1703FP I've had for almost five years, would flicker when returning from power-save mode. I decided I would rather start shopping for a replacement immediately than wait for it to die altogether.
After some deliberation, I chose a Samsung SyncMaster 932B, a 19" TFT-LCD with a maximum supported resolution of 1280 × 1024 @ 75 Hz. The picture looks gorgeous, and the brightness presets have already proven useful. As I anticipated, it presented a small challenge when configuring X.
The monitor's manual states its recommended refresh rate is 60 Hz, but X seemed determined to use the highest available rate. Thinking this must be hard on the monitor, I looked up the supported frequency ranges in the manual and manually added them to my xorg.conf. To edit the file, do
Before I added those lines, X insisted on pushing the monitor to 75 Hz and wouldn't acknowledge other possibilities. I searched until I found an informative how-to and downloaded the GTF modeline generator from the link it provided. To compile the generator, I did the following:
I wanted to be able to run gtf from any working directory, so I moved the executable to /usr/bin:
Problem solved!
After some deliberation, I chose a Samsung SyncMaster 932B, a 19" TFT-LCD with a maximum supported resolution of 1280 × 1024 @ 75 Hz. The picture looks gorgeous, and the brightness presets have already proven useful. As I anticipated, it presented a small challenge when configuring X.
The monitor's manual states its recommended refresh rate is 60 Hz, but X seemed determined to use the highest available rate. Thinking this must be hard on the monitor, I looked up the supported frequency ranges in the manual and manually added them to my xorg.conf. To edit the file, do
sudo vi /etc/X11/xorg.confand add the appropriate ranges to the "Monitor" section. Mine looks like this:
Section "Monitor"HorizSync is measured in kHz and VertRefresh in Hz. DPMS stands for Display Power Management Signaling, and you should enable it if your hardware supports it. I'll explain the last two lines in a moment. They turned out to be essential for getting X to use the monitor's optimum refresh rate.
Identifier "Samsung SyncMaster 932B"
Option "DPMS"
HorizSync 30-81
VertRefresh 56-75
# 1280x1024 @ 60.00 Hz (GTF) hsync: 63.30 kHz; pclk: 108.88 MHz
Modeline "1280x1024_60.00" 108.88 1280 1360 1496 1712 1024 1025 1028
1060 -Hsync +Vsync
EndSection
Before I added those lines, X insisted on pushing the monitor to 75 Hz and wouldn't acknowledge other possibilities. I searched until I found an informative how-to and downloaded the GTF modeline generator from the link it provided. To compile the generator, I did the following:
gcc gtf.c -o gtf -lm -WallInitially GCC warned me
gtf.c: In function ‘parse_command_line’:I've seen that warning before; it usually means you forgot to explicitly include the header file for some C library function—in this case, strcmp, which string.h defines. So I did
gtf.c:665: warning: implicit declaration of function ‘strcmp’
vi gtf.cand added
#include <string.h>after the other includes. As expected, the warning disappeared.
I wanted to be able to run gtf from any working directory, so I moved the executable to /usr/bin:
sudo mv gtf /usr/binI ran it with the desired resolution and refresh rate as arguments:
gtf 1280 1024 60This produced two lines, which I added to the end of the "Monitor" section above. I also needed to change every occurrence of "1280x1024" in the "Screen" section to "1280x1024_60.00" to match the modeline. Then I saved the file, logged out and restarted X with Ctrl+Alt+Backspace.
Problem solved!
Friday, September 14, 2007
Ubuntu Server on Pentium II

For a Pentium II machine I recently revitalized, I wanted to install only the most essential software, so I started from the Ubuntu Server 6.06.1 CD. I did an expert install, since this particular motherboard, an Elitegroup (ECS) P6BX-A+ with Award BIOS, doesn't play nice with GRUB. Plus I planned on some little tweaks, like setting a static IP from the get-go and making a more server-like partitioning scheme.
NOTE: Unless you specify otherwise via the expert installer, Ubuntu disables login as root.
After completing the base installation, during which I opted to use all available repositories, I updated the package indices and installed the necessary packages for X, plus a window manager and other conveniences.
sudo apt-get updateThen I rebooted and was delighted to find the X server started without a single problem.
sudo apt-get upgrade
sudo apt-get install x-window-system-core xdm fluxbox xterm
While installing additional packages, I discovered that it took an intolerably long time to connect to the repositories. Once I installed Firefox, I observed similar delays in loading pages. For some reason, disabling IPv6 (via about:config) got Firefox working, but apt-get remained sluggish. So I used traceroute in the hope of finding the cause.
Apart from the delay in passing through the gateway, which I also observed on my Debian box when I traced the same route for comparison, it wasn't resolving domain names. Instead of the expected output,
traceroute to us.archive.ubuntu.com (91.189.89.8), 30 hops max, 40 byte packetsevery line looked like lines 9-11 above: no FQDN, only an IP. That pointed to a DNS problem. So I opened resolv.conf and found that the resolver had been using my router as its name server—a less than ideal configuration, since my router is an entry-level Linksys. I merely changed resolv.conf to read
1 192.168.1.1 (192.168.1.1) 1.931 ms 1.680 ms 1.782 ms
2 * * *
3 XX-N-N-XXNN.XXXXXXX.pa.panjde.comcast.net (NN.NN.NNN.NN) 8.599 ms 7.877 ms 9.530 ms
4 XX-NN-XXNN.XXXXXXX.pa.panjde.comcast.net (NN.NN.NNN.NNN) 9.573 ms 8.122 ms 9.572 ms
5 XX-NN-XXNN.XXXXXXXX.de.panjde.comcast.net (NN.NN.NNN.NNN) 10.248 ms 8.929 ms 9.522 ms
6 po-10-ur01.norristown.pa.panjde.comcast.net (68.86.209.98) 10.724 ms 9.759 ms 9.519 ms
7 po-10-ur02.norristown.pa.panjde.comcast.net (68.86.209.102) 9.838 ms 10.222 ms 9.526 ms
8 po-21-ar01.wallingford.pa.panjde.comcast.net (68.86.209.106) 12.028 ms 11.325 ms 11.952 ms
9 68.86.91.182 (68.86.91.182) 14.310 ms 14.387 ms 14.187 ms
10 68.86.85.2 (68.86.85.2) 13.551 ms 13.315 ms 14.142 ms
11 68.86.84.153 (68.86.84.153) 17.783 ms 16.573 ms 17.901 ms
12 te-1-3-pr01.ashburn.va.ibone.comcast.net (68.86.84.154) 18.032 ms 16.492 ms 16.894 ms
13 xe-3-1-0.was11.ip.tiscali.net (213.200.84.117) 16.672 ms 17.544 ms 16.504 ms
14 so-6-1-0.lon11.ip.tiscali.net (213.200.80.26) 94.043 ms 93.927 ms 93.544 ms
15 01502-004-01-gw.ip.tiscali.net (213.200.77.114) 93.777 ms 93.384 ms 93.506 ms
16 195.72.129.70 (195.72.129.70) 92.104 ms 90.699 ms 91.123 ms
17 byrd.canonical.com (91.189.88.11) 93.688 ms 93.222 ms 94.142 ms
18 * * *
search hsd1.pa.comcast.net.and restarted networking services:
nameserver 68.87.75.194
nameserver 68.87.64.146
sudo /etc/init.d/networking restartand it worked flawlessly.
The server install achieved exactly what I envisioned for this box: low resource usage. Here's the process tree right now, with one user active.
init─┬─atdYes, I'm writing this post in Firefox on the Ubuntu server with X forwarding to my laptop. Remember, this is a Pentium II at 450MHz, circa 1998. Legacy hardware has a place in modern computing—in the third bedroom, right beside my main Debian box.
├─cron
├─cupsd
├─dd
├─events/0
├─6*[getty]
├─khelper
├─5*[kjournald]
├─klogd
├─ksoftirqd/0
├─kswapd0
├─kthread─┬─aio/0
│ ├─kacpid
│ ├─kblockd/0
│ ├─kgameportd
│ ├─khubd
│ ├─kseriod
│ └─2*[pdflush]
├─mdadm
├─migration/0
├─shpchpd_event
├─sshd───sshd───sshd───bash─┬─firefox-bin───2*[{firefox-bin}]
│ └─pstree
├─syslogd
├─udevd
├─watchdog/0
└─xdm─┬─Xorg
└─xdm
Friday, August 17, 2007
The Slit
Fluxbox has something called the slit. It's like the Windows Vista Sidebar—except n times better because you're not running Windows Vista. In short, it gives you convenient access to "dockable" applications in the form of a sidebar on your desktop.
For example, GKrellM can be run with the "withdrawn" option and will then appear in the slit. It provides an easily customized set of system monitors, so you can keep an eye on your box's vital signs. If you don't have it already, it's no problem to install.
apt-get install gkrellm
gkrellm -w
I know no one's working on the original XMMS project anymore, but I still use it. It can also be docked in the slit. Just run wmxmms & and it should appear there.
The Fluxbox FAQ suggests that you can use wmDrawer to display the Fluxbox logo in the slit. Of course, you could use the same method to display any other image. The FAQ doesn't go into the specifics, but it's simple.
First we install it. I also chose to copy the example resource file to my home directory.
apt-get install wmdrawer
cp /usr/share/doc/wmdrawer/wmdrawerrc.example ~
Then I copied the Fluxbox logo to the directory where wmDrawer looks for images.
cp fb-icon48x48-metal.png /usr/share/pixmaps
The example file also has a line for /usr/local/share/pixmaps, which I ignored because that path doesn't exist on my system. I edited the file to use the logo as its dock icon and commented out the lines defining the buttons, since I don't use them. When I was done, the file looked like this:
Once you've arranged your slit apps to your satisfaction, right-click on the slit. You may need to try clicking in a few different places before you get the slit menu instead of the menu of a slit app. Select the "save slit list" item. Now the next time you restart Fluxbox, all your favorite dockable applications will be at your fingertips.
EDIT: Okay, it took me over a month to realize I omitted some important info here. In order to have your apps run in the slit when you start a Fluxbox session, you must add them to the ~/.fluxbox/startup script. There are plenty of comments in the default script to guide you.
For example, GKrellM can be run with the "withdrawn" option and will then appear in the slit. It provides an easily customized set of system monitors, so you can keep an eye on your box's vital signs. If you don't have it already, it's no problem to install.
apt-get install gkrellm
gkrellm -w
I know no one's working on the original XMMS project anymore, but I still use it. It can also be docked in the slit. Just run wmxmms & and it should appear there.
The Fluxbox FAQ suggests that you can use wmDrawer to display the Fluxbox logo in the slit. Of course, you could use the same method to display any other image. The FAQ doesn't go into the specifics, but it's simple.
First we install it. I also chose to copy the example resource file to my home directory.
apt-get install wmdrawer
cp /usr/share/doc/wmdrawer/wmdrawerrc.example ~
Then I copied the Fluxbox logo to the directory where wmDrawer looks for images.
cp fb-icon48x48-metal.png /usr/share/pixmaps
The example file also has a line for /usr/local/share/pixmaps, which I ignored because that path doesn't exist on my system. I edited the file to use the logo as its dock icon and commented out the lines defining the buttons, since I don't use them. When I was done, the file looked like this:
# Config file example for wmdrawerThe lines I changed are boldfaced. Although it serves a purely cosmetic purpose on my desktop, wmDrawer has many other capabilities. Its documentation can tell you more.
[general]
# Dock's icon [optional]
dock_icon fb-icon48x48-metal.png
# Drawer's opening direction [required]
# Top to bottom = 0
# Right to Left = 1
# Bottom to Top = 2
# Left to Right = 3
direction 2
# Image used for icons' background [optional]
#icons_bg defaultTile.xpm
# Allow icons' enlargement to fit them to buttons' size [optional, default 1]
# 0 indicate that icons should never be larger than their original size.
#icons_expand 1
# Activate the drawer's pseudo-transparency [optional, default 0]
# if you choose transparency, icons_bg will be ignored
#transparency 0
# dock's width: min=12, max=128 [optional, default=64]
#dock_width 64
# dock's height: min=12, max=128 [optional, default=64]
#dock_height 64
# buttons' size: min=12, max=128 [optional]
# Useful for the people who want for example to have big icons
# and to define several columns.
#btns_size 32
# Icon's highlight type: 0, 1 or 2 [optional, default 2]
# 0 : no highlight
# 1 : target (unavailable if transparency is activated)
# 2 : shading
#highlight 2
# Image used as highlight [optional]
# only used if you choice target type
#highlight_img highlight.xpm
# Tint icons by a specified color [optional, default #ffffff]
# only used if you choice shading type
#highlight_tint #ffffff
# Shade icons at a specified level [optional, default 60]
# only used if you choice shading type
#highlight_sh 60
# Display buttons' tooltips [optional, default 1]
#tooltips 1
# Tooltips' font [optional, default fixed]
#tooltips_font fixed
# Drawer's animation speed: 0, 1, 2, 3, 4 [optional, default 1]
#animation_speed 1
# Mouse cursor in drawer: 0, 1, ..., 76 [optional, default 30]
#cursor 30
# Auto opening of the drawer: 0, 1 [optional, default 0]
#show_on_hover 0
# Auto closing of the drawer: 0, 1 [optional, default 0]
#hide_on_out 0
# drawer's hiding timeout in miliseconds [optional, default 1000]
#hide_timeout 1000
# Runs the dockapp in windowed mode: 0, 1 [optional, default 0]
# Useful for AfterStep, Fvwm, Sawfish or KDE users.
#windowed_mode 0
# Instance name so window manager can distinguish between multiple copies
#instance_name distinguish_name
# Drawer's border size in pixels [optional, default 1]
#border_size 1
# Images directories
[images_paths]
/usr/share/pixmaps
/usr/local/share/pixmaps/
# A first column with 5 buttons
# Each button must be defined with this syntax:
# (tooltip) (image) (command)
#[column]
#(X Terminal) (gnome-term.png) (xterm -bg black -fg wheat)
#(Galeon) (galeon.xpm) (galeon -s)
#(Sylpheed) (sylpheed.png) (sylpheed)
#(XChat) (xchat.png) (xchat)
#(MPlayer) (gnome-multimedia.png) (mplayer)
# A second column with 5 buttons
#[column]
#(Xmms) (gnome-audio2.png) (xmms)
#(Gimp) (gnome-gimp.png) (gimp)
#(GQview) (gqview.png) (gqview)
#(Xcalc) (gnome-calc3.png) (xcalc)
#(GFtp) (gftp.png) (gftp)
Once you've arranged your slit apps to your satisfaction, right-click on the slit. You may need to try clicking in a few different places before you get the slit menu instead of the menu of a slit app. Select the "save slit list" item. Now the next time you restart Fluxbox, all your favorite dockable applications will be at your fingertips.
EDIT: Okay, it took me over a month to realize I omitted some important info here. In order to have your apps run in the slit when you start a Fluxbox session, you must add them to the ~/.fluxbox/startup script. There are plenty of comments in the default script to guide you.
Sunday, August 05, 2007
Fluxbox Keys
Over the past several months, I've come to appreciate KDE applications—especially Amarok, Kaffeine and Konqueror. Unfortunately, KDE eats RAM like Cookie Monster once ate cookies. (Those were the days.) So I went back to Fluxbox.
One of my biggest frustrations with Fluxbox used to be the keybindings. The default keyboard shortcuts aren't much like the ones I know from GNOME and KDE. I would often hit Alt+F4, expecting the window to close, and instead get switched to Workspace 4. Then I discovered how easy they are to customize.
The first time you log into a Fluxbox session, it creates a directory ~/.fluxbox where it stores a small handful of config files. Among them is the keys file. All you have to do is remove the bindings you don't want and replace them with your preferred set. Here's mine:
Control F1 :Workspace 1
Control F2 :Workspace 2
Control F3 :Workspace 3
Control F4 :Workspace 4
Control Mod1 Escape :KillWindow
Mod1 F1 :RootMenu
Mod1 F2 :ExecCommand fbrun
Mod1 F4 :Close
Mod1 F9 :Minimize
Mod1 F10 :MaximizeWindow
Mod1 Shift Tab :PrevWindow
Mod1 Tab :NextWindow
I struck a compromise between the GNOME and KDE defaults. Note that Mod1 is the Alt key.
So, for example, I can press Alt+F2 and get what amounts to a "Run…" dialog. Then I enter a command, like xterm, and I'm on my way. It's an particularly handy binding for those who avoid the mouse whenever possible.
More detailed info can be found in the Fluxbox Keybindings section of the docs.
One of my biggest frustrations with Fluxbox used to be the keybindings. The default keyboard shortcuts aren't much like the ones I know from GNOME and KDE. I would often hit Alt+F4, expecting the window to close, and instead get switched to Workspace 4. Then I discovered how easy they are to customize.
The first time you log into a Fluxbox session, it creates a directory ~/.fluxbox where it stores a small handful of config files. Among them is the keys file. All you have to do is remove the bindings you don't want and replace them with your preferred set. Here's mine:
Control F1 :Workspace 1
Control F2 :Workspace 2
Control F3 :Workspace 3
Control F4 :Workspace 4
Control Mod1 Escape :KillWindow
Mod1 F1 :RootMenu
Mod1 F2 :ExecCommand fbrun
Mod1 F4 :Close
Mod1 F9 :Minimize
Mod1 F10 :MaximizeWindow
Mod1 Shift Tab :PrevWindow
Mod1 Tab :NextWindow
I struck a compromise between the GNOME and KDE defaults. Note that Mod1 is the Alt key.
So, for example, I can press Alt+F2 and get what amounts to a "Run…" dialog. Then I enter a command, like xterm, and I'm on my way. It's an particularly handy binding for those who avoid the mouse whenever possible.
More detailed info can be found in the Fluxbox Keybindings section of the docs.
Saturday, August 04, 2007
Domo arigato, ISO-10646-1
A friend gave me a couple of Japanese CDs, which I added to my music collection. When I opened up an XTerm and listed out the directories, I found that the Japanese filenames weren't displayed correctly. Where the characters should have been, there were only empty boxes. Clearly this was a font issue.
As far as I can tell, you only need to add two lines to your .Xresources file:
XTerm*locale: true
XTerm*font: -misc-fixed-medium-r-normal-*-18-120-100-100-c-90-iso10646-1
You could also set the wideFont resource, but I didn't bother. By default, XTerm will simply double the width of the font you specified. For example, the font above has an average width of 90. So the wide font gets a width of 180.
If you want to see which fonts you have at your disposal, run xfontsel and play around with the various pull-down menus.
Then you merge the updated file
xrdb -merge ~/.Xresources
and you're good to go. The next XTerm you open will display Japanese characters perfectly.
As far as I can tell, you only need to add two lines to your .Xresources file:
XTerm*locale: true
XTerm*font: -misc-fixed-medium-r-normal-*-18-120-100-100-c-90-iso10646-1
You could also set the wideFont resource, but I didn't bother. By default, XTerm will simply double the width of the font you specified. For example, the font above has an average width of 90. So the wide font gets a width of 180.
If you want to see which fonts you have at your disposal, run xfontsel and play around with the various pull-down menus.
Then you merge the updated file
xrdb -merge ~/.Xresources
and you're good to go. The next XTerm you open will display Japanese characters perfectly.
Sunday, July 22, 2007
Help a Brother out!
 Brother may make some of the ugliest printers on the market today, but I love how friendly they are toward Linux users. I ran into only one obstacle while setting up my HL-2070N as a network printer, and that wasn't their fault.
The LPR and CUPS (wrapper) drivers are available for download from the Brother Solutions Center. Since Ubuntu uses the Debian package management tools, I chose the Debian LPR driver and CUPS wrapper driver. The instructions Brother provided were clear and concise.
dpkg -i --force-all brhl2070nlpr-2.0.1-1.i386.deb
dpkg -i --force-all cupswrapperHL2070N-2.0.1-1.i386.deb
Ubuntu includes the LPR and CUPS packages, so I didn't need to install them. However, I had to make some slight configuration changes because Ubuntu expects you to set up your printers via the GNOME Print Manager. I'm accustomed to the CUPS web admin tool, which is disabled by default under Ubuntu. To enable it, the cupsys user must be added to the shadow group.
adduser cupsys shadow
passwd cupsys
/etc/init.d/cupsys restart
Note that you need superuser privileges for the above commands to work. Speaking of which, here's how to enable the root user in Ubuntu:
sudo passwd root
Now the only thing left to do is add the printer. Point your web browser to http://localhost:631, where you should find an entry for the Brother printer. For the moment, it's probably configured for a USB connection; that seems to be the default. Click "Modify Printer". The settings you must change are the device and the URI. For device, select "LPD/LPR Host or Printer". For the URI, type lpd://nnn.nnn.nnn.nnn/binary_p1 where n is a digit of the printer's IP address. (You should assign a static IP for the printer.) When you're done, CUPS will prompt you for a username and password. Use root and whatever password you've set.
That ought to do it. Enjoy your network printer!
Wednesday, July 18, 2007
Samba Server
A few weeks ago, I decided I would make my Linux box the file server for my network. Since shared files and folders must be accessible from Windows and Mac machines, Samba seemed like the best cross-platform solution.
The installation turned out to be a relatively painless process. Here's how I did it on Ubuntu Dapper.
First we need to install a couple of packages:
sudo apt-get install samba smbfs
I'm not positive that smbfs is required for the Samba server, but most guides recommend it. So I'll follow their lead.
A vanilla install of Ubuntu should be properly configured for Samba, so there's not much else to do besides add to the list of Samba users. In the second line, you may replace sudo with gksudo if you prefer one of the GTK editors, like gedit. There may be an analogous command for KDE apps, but I rarely run them as superuser, so I wouldn't know.
sudo smbpasswd -a system_username
sudo vi /etc/samba/smbusers
where system_username is the user you wish to add as a Samba user. You will be prompted to create a password. This is the password the user will use to connect to Samba shares.
We must add the following line to /etc/samba/smbusers:
system_username = "network username"
Note you may make the network username different from the system username. There are a variety of reasons you might do this. For example, the user may have a different name on the machine from which he will connect to the Samba shares. You might alternately designate a unique username as a security measure.
To set up your Samba shares, you must either edit /etc/samba/smb.conf by hand or install SWAT, which supposedly does the dirty work for you. Either way, the lines you add to the file should look something like this:
I'm typing this from my PowerBook, running Mac OS X 10.4.10, while connected to one of the Samba shares. So it definitely works.
The installation turned out to be a relatively painless process. Here's how I did it on Ubuntu Dapper.
First we need to install a couple of packages:
sudo apt-get install samba smbfs
I'm not positive that smbfs is required for the Samba server, but most guides recommend it. So I'll follow their lead.
A vanilla install of Ubuntu should be properly configured for Samba, so there's not much else to do besides add to the list of Samba users. In the second line, you may replace sudo with gksudo if you prefer one of the GTK editors, like gedit. There may be an analogous command for KDE apps, but I rarely run them as superuser, so I wouldn't know.
sudo smbpasswd -a system_username
sudo vi /etc/samba/smbusers
where system_username is the user you wish to add as a Samba user. You will be prompted to create a password. This is the password the user will use to connect to Samba shares.
We must add the following line to /etc/samba/smbusers:
system_username = "network username"
Note you may make the network username different from the system username. There are a variety of reasons you might do this. For example, the user may have a different name on the machine from which he will connect to the Samba shares. You might alternately designate a unique username as a security measure.
To set up your Samba shares, you must either edit /etc/samba/smb.conf by hand or install SWAT, which supposedly does the dirty work for you. Either way, the lines you add to the file should look something like this:
[music]
  path = /windows/Music
  browseable = yes
  writeable = yes
  valid users = jlz27
  admin users = jlz27
I'm typing this from my PowerBook, running Mac OS X 10.4.10, while connected to one of the Samba shares. So it definitely works.
Sunday, April 08, 2007
Thanks, Jörg Höhle!
Count on a guy with umlauts in his name to find a fix for the problem with displaying special characters in filenames, mentioned in my previous entry on Samba. Here's the bug report he submitted:
In case you didn't read the whole report, I'll sum it up. If you mount your share with the options codepage=cp437,iocharset=utf8, for example, special characters like the umlaut will display correctly.
I used codepage 437 because it's the default for FAT and VFAT filesystems. I haven't tested it with codepage 852 nor do I plan to do so.
If you have success with another codepage option, I invite you to post your experience here so other readers may benefit from your efforts.
Hi,
The Gnome desktop network mounter, the smbclient and a native MS-Windows-2k manage to display Umlaute in filenames from a Linux Samba server just fine.
Using smbmount however, an ls command merely displays "?" in lieu of the Umlauts in concerned filenames.
Trying out many combinations of iocharset and codepage options I finally got Umlaute to display fine as follows:
mount -t smbfs -o username=xyz,uid=hoehle,gid=hoehle,file_mode=0640,codepage=cp437,
iocharset=utf8 //10.0.0.79/hoehle /mnt/samba
which seems equivalent to:
smbmount //10.0.0.79/hoehle /mnt/samba -o username=xyz,uid=hoehle,gid=hoehle,file_mode=0640,codepage=cp437,
iocharset=utf8
codepage=utf8,iocharset=utf8 produces :x84 :x9a for some umlauts in ls output.
codepage=iso8859-1 produces :0084 :009a instead.
codepage=cp437, utf16 or utf-16 produce "?" instead.
codepage=cp852,iocharset=utf8 finally works.
codepage=cp437,iocharset=utf8 also works.
Note that the iocharset option must be given as well.
man mount on fat says: "By default, codepage 437 is used."
For consistency, I'd expect similar defaults with smbfs.
Similarly, I'm quite surprised that iocharset=utf8 is needed. I'd thought most Linux software did the transition to UTF-8 these days (since Hoary, Warty was not fully there).
smbfs should be as easy to use and provide similar defaults as all of smbclient, the Gnome desktop and MS-Windows do.
Affects: Dapper with http://wiki.ubuntu.com/LaptopTestingTeam/
FujitsuLifebookC1110
Regards,
Jörg Höhle
In case you didn't read the whole report, I'll sum it up. If you mount your share with the options codepage=cp437,iocharset=utf8, for example, special characters like the umlaut will display correctly.
I used codepage 437 because it's the default for FAT and VFAT filesystems. I haven't tested it with codepage 852 nor do I plan to do so.
If you have success with another codepage option, I invite you to post your experience here so other readers may benefit from your efforts.
Wednesday, March 07, 2007
Só Danço Samba
I ought to mention that I've successfully mounted Windows shares using the following form:
sudo mount -t smbfs //HOSTNAME/SHARENAME /MOUNTPOINT
That's the Server Message Block (SMB) file system, which is what modern Windows OSes use to share files and printers. So if you wanted to mount a share called "Music," located on a server with IP address 192.168.1.100, to local directory /media/Music, you would enter
sudo mount -t smbfs //192.168.1.100/Music /media/Music
and then you'll be able to access the files as though they were stored locally. Don't expect playback of high-quality video files to go smoothly, though. It's like streaming without a buffer, so you'll probably drop a lot of frames. For almost anything else, it's great.
Mac OS X can mount shares from the Finder GUI. Go → Connect to Server… or the ⌘K shortcut opens a window that will let you specify a server address. You can also bookmark frequently used servers. To connect to the server from our previous example, you would type smb://192.168.1.100 and click Connect. In my experience, you can also use the computer name. My Windows file server is named "cryptkeeper," so I connect using smb://cryptkeeper, which defaults to the guest account. If you want to specify a user account for login, use smb://USERNAME@HOSTNAME instead.
(Note that you must create the local directory before mounting the share. The mount command won't create it automatically.)
I still need to play around with the mount options, since Ubuntu doesn't seem to recognize the accented letters in certain filenames, e.g., Hüsker Dü, Múm, Röyksopp. Maybe it would help to mount the share with a different character set; UTF-8 springs to mind. I'll probably have to use smbmount if I want to do that, though. I seem to remember reading that mount doesn't actually know anything about smbfs. If I find more info on this, it will be posted here.
sudo mount -t smbfs //HOSTNAME/SHARENAME /MOUNTPOINT
That's the Server Message Block (SMB) file system, which is what modern Windows OSes use to share files and printers. So if you wanted to mount a share called "Music," located on a server with IP address 192.168.1.100, to local directory /media/Music, you would enter
sudo mount -t smbfs //192.168.1.100/Music /media/Music
and then you'll be able to access the files as though they were stored locally. Don't expect playback of high-quality video files to go smoothly, though. It's like streaming without a buffer, so you'll probably drop a lot of frames. For almost anything else, it's great.
Mac OS X can mount shares from the Finder GUI. Go → Connect to Server… or the ⌘K shortcut opens a window that will let you specify a server address. You can also bookmark frequently used servers. To connect to the server from our previous example, you would type smb://192.168.1.100 and click Connect. In my experience, you can also use the computer name. My Windows file server is named "cryptkeeper," so I connect using smb://cryptkeeper, which defaults to the guest account. If you want to specify a user account for login, use smb://USERNAME@HOSTNAME instead.
(Note that you must create the local directory before mounting the share. The mount command won't create it automatically.)
I still need to play around with the mount options, since Ubuntu doesn't seem to recognize the accented letters in certain filenames, e.g., Hüsker Dü, Múm, Röyksopp. Maybe it would help to mount the share with a different character set; UTF-8 springs to mind. I'll probably have to use smbmount if I want to do that, though. I seem to remember reading that mount doesn't actually know anything about smbfs. If I find more info on this, it will be posted here.
Thursday, February 01, 2007
Dapper worthy of long-term support
I decided to upgrade my desktop OS to Ubuntu 6.06 LTS "Dapper Drake." The LTS stands for long-term support. That is, Canonical has pledged to provide support for Dapper for three years from its release date. I guess, with Dapper, they knew they had a keeper.
 Set aside for a moment the fact that the install CD includes a video of an interview with Nelson Mandela, in which he expounds on the meaning of "ubuntu." It's over the top, if you ask me.
This is solid distro. The CD includes all the necessary packages for a working GNOME desktop environment, plus a wisely limited selection of popular applications. This design decision stands in sharp contrast to the one manifest in Debian, in which the list of basic desktop packages is horribly bloated. (That this is a long-standing criticism of Debian doesn't make it less valid.) I was pleasantly surprised to find that Ubuntu installed the desktop environment and only a small handful of applications, giving me the opportunity to choose what else, if anything, to install.
What's more, the hardware detection went almost flawlessly. I added aic7xxx=no_probe to the boot options, and it "just worked." I didn't even have to edit my xorg.conf with the horizontal sync and vertical refresh rates. The optimal settings for my monitor, a Dell 1703FP, are 1280 x 1024 @ 60Hz. It's set at 75Hz, but I'm fine with that.
It was also easy to add repositories. I went to UbuntuGuide.org and overwrote my sources.list with the one provided there. It worked like a charm; I got all the packages I needed and then some.
Last but not least, I can access the shared files/folders on the other desktop on our network, which runs Windows XP. I connect to smb://guest@HOSTNAME/SHARENAME. The hostname can be replaced with the server's IP address. This has been reported to work in some situations where the hostname isn't recognized. It works both ways on my network. There must be a way to connect using a password-protected account, but I haven't investigated this thoroughly.
So I'm feeling quite satisfied. However, to be fair, I do have a small handful of grievances with this release, which I may as well air here (in bullet points because I'm short on time):
Image from Nuxified.org
 Set aside for a moment the fact that the install CD includes a video of an interview with Nelson Mandela, in which he expounds on the meaning of "ubuntu." It's over the top, if you ask me.
This is solid distro. The CD includes all the necessary packages for a working GNOME desktop environment, plus a wisely limited selection of popular applications. This design decision stands in sharp contrast to the one manifest in Debian, in which the list of basic desktop packages is horribly bloated. (That this is a long-standing criticism of Debian doesn't make it less valid.) I was pleasantly surprised to find that Ubuntu installed the desktop environment and only a small handful of applications, giving me the opportunity to choose what else, if anything, to install.
What's more, the hardware detection went almost flawlessly. I added aic7xxx=no_probe to the boot options, and it "just worked." I didn't even have to edit my xorg.conf with the horizontal sync and vertical refresh rates. The optimal settings for my monitor, a Dell 1703FP, are 1280 x 1024 @ 60Hz. It's set at 75Hz, but I'm fine with that.
It was also easy to add repositories. I went to UbuntuGuide.org and overwrote my sources.list with the one provided there. It worked like a charm; I got all the packages I needed and then some.
Last but not least, I can access the shared files/folders on the other desktop on our network, which runs Windows XP. I connect to smb://guest@HOSTNAME/SHARENAME. The hostname can be replaced with the server's IP address. This has been reported to work in some situations where the hostname isn't recognized. It works both ways on my network. There must be a way to connect using a password-protected account, but I haven't investigated this thoroughly.
So I'm feeling quite satisfied. However, to be fair, I do have a small handful of grievances with this release, which I may as well air here (in bullet points because I'm short on time):
- I didn't see option to set the root password during the install process. I need to look into this because I'm worried the default is something asinine like "admin". Luckily the installer adds your first user account to the list of sudoers, so you're still able to edit system internals.
- If you decide not to partition your hard drive manually, the automatic partitioning scheme available puts everything—except the swap, of course—on a single ext3 partition. By contrast, Debian lets you choose between three schemes: a single partition, a separate home partition and separate partitions for almost everything.
- The Ubuntu splash screen displays at some weird resolution, like 720 x 400. It doesn't seem to matter how you tell the live CD to set it. If you can specify a resolution for the splash when running from the CD, there must be a way to do it when running from the hard drive. This is a relatively low priority, though.
- Emacs still isn't included in the desktop packages. This is an almost trivial issue, but one that continues to irk me.
Image from Nuxified.org
Saturday, January 27, 2007
Etch-a-Sketch
I've finally made some progress installing Debian on my PowerBook. I took the laptop to campus last week and ran a net install of Debian Etch. Everything went well until the installation was complete, when I discovered the X server wouldn't start. Aïe! Luckily it turned out to be nothing serious.
After delivering a proper barrage of expletives, I decided to tweak the configuration a bit. Among the errors in the X server were one line about DRI and a couple of lines about the Synaptics touchpad driver. The latter was simple enough to fix. I opened the X server configuration file and commented out the sections that mentioned Synaptics.
So that took care of the errors about the Synaptics driver. I later removed those lines altogether, once I was sure they weren't needed. The DRI error proved to be more frustrating to remedy. I'll skip the gory details and just say that I had to disable the framebuffer device. Here's how my config file looks now.
Matthias Schmidt reported that an older 2.4 kernel, courtesy of Benjamin Herrenschmidt, didn't correctly recognize the CPU clock frequency. That doesn't seem to be a problem with the 2.6.17-2-powerpc kernel in Etch. You can enter the following command to see your clock frequency.
For me, this outputs 1333.333000MHz, which my limited mental math skills tell me equals 1.33GHz and is therefore accurate. However, the problems with power management haven't been remedied yet.
The source of all the difficulty is the GeForce FX Go5200. NVIDIA hasn't released open source drivers for the PowerPC and probably never will. I can't say I blame them. To the best of my knowledge, Apple didn't start using NVIDIA chips in their machines until the advent of OS X. At this point, no sane user of Apple hardware would run GNU/Linux when Tiger "just works" to a degree that its free counterpart has yet to achieve. Thus I return to OS X on my PowerBook G4.
I offer my apologies to those who were hoping for more information on this topic. You may find these resources useful.
After delivering a proper barrage of expletives, I decided to tweak the configuration a bit. Among the errors in the X server were one line about DRI and a couple of lines about the Synaptics touchpad driver. The latter was simple enough to fix. I opened the X server configuration file and commented out the sections that mentioned Synaptics.
nano /etc/X11/xorg.confSo that took care of the errors about the Synaptics driver. I later removed those lines altogether, once I was sure they weren't needed. The DRI error proved to be more frustrating to remedy. I'll skip the gory details and just say that I had to disable the framebuffer device. Here's how my config file looks now.
Section "Files"Those two changes got me a working X server. As usual, there are some lingering issues to be resolved but not as many as I expected.
FontPath "/usr/share/fonts/X11/misc"
FontPath "/usr/X11R6/lib/X11/fonts/misc"
FontPath "/usr/share/fonts/X11/cyrillic"
FontPath "/usr/X11R6/lib/X11/fonts/cyrillic"
FontPath "/usr/share/fonts/X11/100dpi/:unscaled"
FontPath "/usr/X11R6/lib/X11/fonts/100dpi/:unscaled"
FontPath "/usr/share/fonts/X11/75dpi/:unscaled"
FontPath "/usr/X11R6/lib/X11/fonts/75dpi/:unscaled"
FontPath "/usr/share/fonts/X11/Type1"
FontPath "/usr/X11R6/lib/X11/fonts/Type1"
FontPath "/usr/share/fonts/X11/100dpi"
FontPath "/usr/X11R6/lib/X11/fonts/100dpi"
FontPath "/usr/share/fonts/X11/75dpi"
FontPath "/usr/X11R6/lib/X11/fonts/75dpi"
# path to defoma fonts
FontPath "/var/lib/defoma/x-ttcidfont-conf.d/dirs/TrueType"
EndSection
Section "Module"
Load "i2c"
Load "bitmap"
Load "ddc"
Load "dri"
Load "extmod"
Load "freetype"
Load "glx"
Load "int10"
Load "vbe"
EndSection
Section "InputDevice"
Identifier "Generic Keyboard"
Driver "kbd"
Option "CoreKeyboard"
Option "XkbRules" "xorg"
Option "XkbModel" "pc104"
Option "XkbLayout" "us"
EndSection
Section "InputDevice"
Identifier "Configured Mouse"
Driver "mouse"
Option "CorePointer"
Option "Device" "/dev/input/mice"
Option "Protocol" "ImPS/2"
Option "Emulate3Buttons" "true"
EndSection
Section "Device"
Identifier "nVidia Corporation NV34M [GeForce FX Go5200]"
Driver "nv"
BusID "PCI:0:16:0"
Option "UseFBDev" "false"
EndSection
Section "Monitor"
Identifier "Color LCD"
Option "DPMS"
HorizSync 28-51
VertRefresh 43-60
EndSection
Section "Screen"
Identifier "Default Screen"
Device "nVidia Corporation NV34M [GeForce FX Go5200]"
Monitor "Color LCD"
DefaultDepth 16
SubSection "Display"
Depth 1
Modes "1024x768"
EndSubSection
SubSection "Display"
Depth 4
Modes "1024x768"
EndSubSection
SubSection "Display"
Depth 8
Modes "1024x768"
EndSubSection
SubSection "Display"
Depth 15
Modes "1024x768"
EndSubSection
SubSection "Display"
Depth 16
Modes "1024x768"
EndSubSection
SubSection "Display"
Depth 24
Modes "1024x768"
EndSubSection
EndSection
Section "ServerLayout"
Identifier "Default Layout"
Screen "Default Screen"
InputDevice "Generic Keyboard"
InputDevice "Configured Mouse"
EndSection
Section "DRI"
Mode 0666
EndSection
Matthias Schmidt reported that an older 2.4 kernel, courtesy of Benjamin Herrenschmidt, didn't correctly recognize the CPU clock frequency. That doesn't seem to be a problem with the 2.6.17-2-powerpc kernel in Etch. You can enter the following command to see your clock frequency.
cat /proc/cpuinfo | grep clockFor me, this outputs 1333.333000MHz, which my limited mental math skills tell me equals 1.33GHz and is therefore accurate. However, the problems with power management haven't been remedied yet.
The source of all the difficulty is the GeForce FX Go5200. NVIDIA hasn't released open source drivers for the PowerPC and probably never will. I can't say I blame them. To the best of my knowledge, Apple didn't start using NVIDIA chips in their machines until the advent of OS X. At this point, no sane user of Apple hardware would run GNU/Linux when Tiger "just works" to a degree that its free counterpart has yet to achieve. Thus I return to OS X on my PowerBook G4.
I offer my apologies to those who were hoping for more information on this topic. You may find these resources useful.
Thursday, December 21, 2006
PowerPC + NVIDIA + Linux = Headaches
Earlier this week, I got the idea into my head that I would reformat the hard disk on my 12" 1.33GHz PowerBook G4, model number M9183LL/A, and install some flavor of Linux on it. I'm not talking about a dual-boot system. No way, José! I want the distro I choose to be the only OS on the machine. Well, easier said than done, it seems.
I rather arbitrarily picked Gentoo, mostly because I've been itching to try it and partly because Drexel University's CS machines run it. I'm glad it wasn't the first time I was installing a Linux distro; a Gentoo installation requires you to manually configure your kernel. Thankfully the Gentoo Foundation's docs made it a painless procedure. Unfortunately I neglected to download the ISO for the Package CD until I had already completed the base installation. At this point, I realized the ISO is too large to fit on a 700MB CD-R. I wasn't interested in going out and buying 870MB discs, so I decided I had nothing to lose by moving to a different distro. (Net install wasn't an option because it seems our ISP only allows one MAC address per customer with its basic service.) Ubuntu was next on my list, since I had great success with it when I was a newbie.
I downloaded Ubuntu 6.10 Edgy, the current release.1 The streamlined graphical installer—and video interview with Nelson Mandela, included on the Live CD—made me think twice about continuing. I've grown accustomed (or, some might say, desensitized) to poorly color-coordinated, often inscrutable Linux interfaces. This new Ubuntu installer bears an unsettling resemblance to the Windows XP installer. It asks you the same questions: language, time zone, user name and password. The only potentially intimidating part is partitioning your disk, and it offers to do that for you. Personal prejudices aside, Edgy did deliver a functional Linux OS in a matter of minutes with minimal effort on my part.
Of course, as with any Linux installation, there were some lingering issues to be resolved:
To be deprived of power management spoils mobile computing for me. I wasn't ready to give up on Ubuntu, so I turned to Google.
1 There is also Ubuntu 6.06 Dapper, which promises 3 years of support on the desktop. I read yesterday that it's more stable on the PPC than Edgy.
2 For the uninitiated, there are two types, suspend-to-RAM and suspend-to-disk. The former freezes all processes and stores their state in RAM, powering off all other hardware. This allows for fast resume but does have the disadvantage of causing an unclean crash in the event of a power interruption. The latter saves the processes' state to the hard disk and shuts down the entire system. As you might expect, it takes longer to resume from suspend-to-disk.
3 There are myriad petitions online urging NVIDIA to release open source drivers. It seems NVIDIA hasn't heard or doesn't care. I wouldn't hold out hope for seeing these drivers anytime soon.
I rather arbitrarily picked Gentoo, mostly because I've been itching to try it and partly because Drexel University's CS machines run it. I'm glad it wasn't the first time I was installing a Linux distro; a Gentoo installation requires you to manually configure your kernel. Thankfully the Gentoo Foundation's docs made it a painless procedure. Unfortunately I neglected to download the ISO for the Package CD until I had already completed the base installation. At this point, I realized the ISO is too large to fit on a 700MB CD-R. I wasn't interested in going out and buying 870MB discs, so I decided I had nothing to lose by moving to a different distro. (Net install wasn't an option because it seems our ISP only allows one MAC address per customer with its basic service.) Ubuntu was next on my list, since I had great success with it when I was a newbie.
I downloaded Ubuntu 6.10 Edgy, the current release.1 The streamlined graphical installer—and video interview with Nelson Mandela, included on the Live CD—made me think twice about continuing. I've grown accustomed (or, some might say, desensitized) to poorly color-coordinated, often inscrutable Linux interfaces. This new Ubuntu installer bears an unsettling resemblance to the Windows XP installer. It asks you the same questions: language, time zone, user name and password. The only potentially intimidating part is partitioning your disk, and it offers to do that for you. Personal prejudices aside, Edgy did deliver a functional Linux OS in a matter of minutes with minimal effort on my part.
Of course, as with any Linux installation, there were some lingering issues to be resolved:
- I immediately noticed that I couldn't adjust the screen brightness. The Fn+F1 and +F2 key combinations displayed a brightness indicator, but the actual level didn't correspond to the indicated level. In fact, it didn't change at all.
- Next I discovered that suspend doesn't work.2 When I closed the lid and the switch engaged, the screen went blank, but I could still hear the fan spinning.
To be deprived of power management spoils mobile computing for me. I wasn't ready to give up on Ubuntu, so I turned to Google.
- The NVIDIA GeForce FX Go5200 equipped in my PowerBook lacks an official driver for the PowerPC (PPC) architecture. This goes for all NVIDIA GPUs. That's a pain.3
- Power management is perhaps the most challenging aspect of configuring the Linux kernel. It requires tight integration of your OS, BIOS and hardware.
- A daemon called pmud may alleviate some of the problems users are experiencing running Ubuntu for PPC. (I've already come up with a slew of clever puns for the post I'll probably be writing about it. Consider yourself warned.)
- Install Debian GNU/Linux "sarge" on Apple PowerBook G4 Aluminum (12-inch 1.33GHz)
- Linux on an Apple Powerbook HOWTO
1 There is also Ubuntu 6.06 Dapper, which promises 3 years of support on the desktop. I read yesterday that it's more stable on the PPC than Edgy.
2 For the uninitiated, there are two types, suspend-to-RAM and suspend-to-disk. The former freezes all processes and stores their state in RAM, powering off all other hardware. This allows for fast resume but does have the disadvantage of causing an unclean crash in the event of a power interruption. The latter saves the processes' state to the hard disk and shuts down the entire system. As you might expect, it takes longer to resume from suspend-to-disk.
3 There are myriad petitions online urging NVIDIA to release open source drivers. It seems NVIDIA hasn't heard or doesn't care. I wouldn't hold out hope for seeing these drivers anytime soon.
Monday, June 19, 2006
X11 marks the spot
Over the past year, I've grown fond of my Linux box and sorely miss it when I'm using my PowerBook on the go. Luckily a couple of computer science professors introduced me to two invaluable tools. Now I can run my favorite programs without going through the hassle of installing a separate OS.
The first tool is Fink. This project ports Unix software to Darwin and Mac OS X. It also allows you to manage your packages with dpkg and apt-get, one of the most attractive and celebrated features of Debian. Download Fink from the SourceForge project site and install it. Installation instructions are available there. I ran into trouble because I already had a .profile and .Xresources file. I moved these files to another path and ran pathsetup.sh again. After that, everything went smoothly. Once you have Fink installed, you can use dselect and apt-get on the command line—which I'm sure makes you very happy if you're a Debian vet.
Now you'll want to install Apple's X11 or XDarwin. When you're running X11 within Mac OS X, it probably makes more sense to choose Apple's X11, even though it doesn't have quite the same features as XDarwin does. Supposedly it is available on the third Panther CD. (Since I only have the first two Panther CDs, I can't confirm this.) I downloaded it from the Apple web site. The installation was easy.
Before you start your X server for the first time, you should configure it to initialize Fink. You'll need a file named .xinitrc in your home directory for this. I copied an existing one and modified it to suit my needs.
$ cp /private/etc/X11/xinit/xinitrc ~/.xinitrc
Open the copy in your favorite editor.
$ sudo emacs .xinitrc
Now add the following line to the top of the file. This will tell the X server to initialize Fink before anything else. In my copy, I added three more lines at the end of the file to start the KDE window manager.* You can do other cool things, but I'll leave it at that for this example.
. /sw/bin/init.sh
export KDEWM=kwin
quartz-wm --only-proxy &
/sw/bin/startkde > /tmp/kde.log 2>&1
Once you've saved the file, you can begin using your X11 environment. To start Apple's X11, go to the Utilities folder (Command + Shift + U in Finder) and double-click X11. You need to change your preferences to run in full screen mode. Full screen mode is toggled with the Command + Option + A shortcut. Once the X server has initialized you have a UNIX-like environment for your computing pleasure.
* Note that you don't have to use KDE. I chose it because it seems to be the most fully supported window manager for Fink.
The first tool is Fink. This project ports Unix software to Darwin and Mac OS X. It also allows you to manage your packages with dpkg and apt-get, one of the most attractive and celebrated features of Debian. Download Fink from the SourceForge project site and install it. Installation instructions are available there. I ran into trouble because I already had a .profile and .Xresources file. I moved these files to another path and ran pathsetup.sh again. After that, everything went smoothly. Once you have Fink installed, you can use dselect and apt-get on the command line—which I'm sure makes you very happy if you're a Debian vet.
Now you'll want to install Apple's X11 or XDarwin. When you're running X11 within Mac OS X, it probably makes more sense to choose Apple's X11, even though it doesn't have quite the same features as XDarwin does. Supposedly it is available on the third Panther CD. (Since I only have the first two Panther CDs, I can't confirm this.) I downloaded it from the Apple web site. The installation was easy.
Before you start your X server for the first time, you should configure it to initialize Fink. You'll need a file named .xinitrc in your home directory for this. I copied an existing one and modified it to suit my needs.
$ cp /private/etc/X11/xinit/xinitrc ~/.xinitrc
Open the copy in your favorite editor.
$ sudo emacs .xinitrc
Now add the following line to the top of the file. This will tell the X server to initialize Fink before anything else. In my copy, I added three more lines at the end of the file to start the KDE window manager.* You can do other cool things, but I'll leave it at that for this example.
. /sw/bin/init.sh
export KDEWM=kwin
quartz-wm --only-proxy &
/sw/bin/startkde > /tmp/kde.log 2>&1
Once you've saved the file, you can begin using your X11 environment. To start Apple's X11, go to the Utilities folder (Command + Shift + U in Finder) and double-click X11. You need to change your preferences to run in full screen mode. Full screen mode is toggled with the Command + Option + A shortcut. Once the X server has initialized you have a UNIX-like environment for your computing pleasure.
* Note that you don't have to use KDE. I chose it because it seems to be the most fully supported window manager for Fink.
Friday, January 20, 2006
Brown paper Fluxboxes tied up with string
Fluxbox is a window manager for X. Its chief advantage over Metacity—the window manager with which you'll be familiar if you use GNOME—is its streamlined design; it runs much faster. For this reason, distros like DSL use it as their default window manager. It can also be customized by editing a few text files. Users often set up impressive Fluxbox themes (see below). Unfortunately it didn't "just work" on my Debian system.
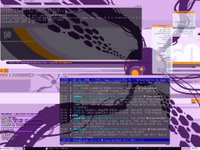 Several FAQs on setting up Fluxbox mention an executable called fluxbox-generate_menu. When run, it's supposed to take an inventory of your applications and generate corresponding items in the Fluxbox menu, which initially lists nothing but a launcher for xterm and the options to restart Fluxbox or logout. It isn't the best tool; it tends to clutter your menu with items you never actually use and omit ones you do. But I consider it more efficient to run it and then adjust the menu accordingly, rather than track down every application and add them to ~/.fluxbox/menu. There was one problem: installing the fluxbox package didn't seem to install fluxbox-generate_menu as promised. I had to search for a while before I found the solution.
It's kind of dopey. Apparently there's a bug in the package, and consequently the archive containing fluxbox-generate_menu doesn't get decompressed and copied to /usr/bin during the installation. So we have to do it manually. It's not tough.
# cd /usr/share/doc/fluxbox
# gunzip fluxbox-generate_menu.gz
# cp fluxbox-generate_menu /usr/bin
# chmod a+x /usr/bin/fluxbox-generate_menu
Let's go line by line. The cd command changes your working directory. Then the gunzip command decompresses or "unzips" the archive. You could alternately use gzip -d here. We use the cp command to copy the executable to the appropriate directory. The chmod a+x command gives all users permission to run it; otherwise only the root user could. It can be used with other options for different effects.
These commands should all be run as the root user. You can become root by entering sudo su at the command line or by logging in with user name "root" and the root password (not your user password, which may be different).
I'm still having a problem with fluxbox-generate_menu, but that's a discussion for another day.
 Several FAQs on setting up Fluxbox mention an executable called fluxbox-generate_menu. When run, it's supposed to take an inventory of your applications and generate corresponding items in the Fluxbox menu, which initially lists nothing but a launcher for xterm and the options to restart Fluxbox or logout. It isn't the best tool; it tends to clutter your menu with items you never actually use and omit ones you do. But I consider it more efficient to run it and then adjust the menu accordingly, rather than track down every application and add them to ~/.fluxbox/menu. There was one problem: installing the fluxbox package didn't seem to install fluxbox-generate_menu as promised. I had to search for a while before I found the solution.
It's kind of dopey. Apparently there's a bug in the package, and consequently the archive containing fluxbox-generate_menu doesn't get decompressed and copied to /usr/bin during the installation. So we have to do it manually. It's not tough.
# cd /usr/share/doc/fluxbox
# gunzip fluxbox-generate_menu.gz
# cp fluxbox-generate_menu /usr/bin
# chmod a+x /usr/bin/fluxbox-generate_menu
Let's go line by line. The cd command changes your working directory. Then the gunzip command decompresses or "unzips" the archive. You could alternately use gzip -d here. We use the cp command to copy the executable to the appropriate directory. The chmod a+x command gives all users permission to run it; otherwise only the root user could. It can be used with other options for different effects.
These commands should all be run as the root user. You can become root by entering sudo su at the command line or by logging in with user name "root" and the root password (not your user password, which may be different).
I'm still having a problem with fluxbox-generate_menu, but that's a discussion for another day.
Saturday, January 14, 2006
Little Debbie
 About a week ago, I noticed that the music I have on my second 80GB hard drive doesn't fill even half the space. So I did what any self-respecting geek would do; I installed Debian in the free space. As usual, I had a couple of false starts before I got going.
Debian proved to be challenging to install and configure. This may have been due, in part, to the quirks of my Dell GX270. (Linux has historically had trouble handling the USB controllers in certain Dell machines.)
Initially I installed the 2.4 kernel. But when I discovered I could have chosen the 2.6 kernel instead, I decided to try it. It didn't work so well. Every time it reached a certain point in the boot sequence—presumably the point at which the USB controllers are probed—it would encounter a "control timeout on ep0in". The Xserver wouldn't start. I searched all over the Internet but was unable to find any information on this error. I found more users with the same problem, but no one had a solution. Frustrated, I decided it wasn't worth the trouble. The earlier kernel didn't support a hardware abstraction layer (HAL), but at least it didn't break my Xserver.
Having finally settled on the 2.4 kernel, I realized Debian doesn't have the same set of packages as Ubuntu does. This wasn't a huge surprise per se, but I was annoyed to find that many of the packages I easily installed via Synaptic in Ubuntu 5.10 were nowhere to be found. In particular, the NVIDIA drivers were absent. Luckily Andrew Schulman, a statistician and programmer at the EPA, wrote step-by-step instructions for installing the drivers in Debian. The key point I gleaned from reading them was that the drivers aren't available in the same kind of monolithic package found in the Ubuntu repositories. With Ubuntu, I didn't have to choose between different kernel modules; there was one package called "nvidia-glx" and that was what I installed. Debian has a different package for each kernel (e.g. nvidia-kernel-2.4.27-2-386 for the 2.4 kernel on the Intel 386 architecture) plus the nvidia-kernel-common package. Once I realized that, I had no problem installing the drivers.
Maybe this is just my machine, but sometimes the Xserver doesn't seem to start with the correct display settings. It happened in Ubuntu as well. I hear the sound telling me the login screen has loaded, but I see only a blank screen. When that happens, pressing Ctrl+Alt+Backspace to restart the Xserver usually fixes it.
I should have mentioned this right up front, but installing playback support for proprietary multimedia formats is a pain in the rear in Debian. Either rip all your music in Ogg Vorbis—or FLAC, if you have a small collection or a large hard drive—or get used to the idea of installing a ton of unstable and/or experimental packages from unofficial sources such as Christian Marillat and RareWares. Getting AAC support in XMMS was, by far, the most difficult task. It seems I've almost completely repressed the unpleasant memories. I do recall the necessary plugin being in a package called something like "xmms-aac" or "xmms-faad".
After fussing with the AAC plugin, I didn't feel like doing much else. I downloaded a Debian wallpaper I like better than the default one. Now I'm eyeing a different one, though. But these decisions are hardly momentous.
I'm impressed with Debian, but I don't think I'd give up Ubuntu for it. Ubuntu makes it easier to add the features I want without jumping through a lot of hoops. Even so, I imagine there's a reason so many university CS labs use Debian systems—I just haven't found it yet.
Thursday, December 29, 2005
Damn Small Linux (DSL)
 Today marked my introduction to Damn Small Linux (DSL). On the whole, I'm impressed and pleased. It was certainly an ordeal to get it installed, but that was no fault of the distro.
Okay, it took me several months to get around to writing this entry, but here it is.
I was installing DSL on a Compaq Presario 9548, circa 1995. It's one of those annoying designs that doesn't have a true BIOS, only a small partition at the beginning of the hard drive that facilitates minor configuration changes. To make matters worse, the CD-ROM isn't included in the boot sequence. I guess in '95 no one at Compaq imagined bootable CDs would someday exist. Luckily DSL offers a bootable floppy disk image. Search their web site and you'll find it soon enough.
I began by formatting a 1.44-MB floppy disk and writing the image to it. For the latter, I used WinImage, but you could probably do just as well with a command line tool like fdimage or rawrite. Both are available from the kind folks at the FreeBSD Project.
With the boot floppy I was able to start the CD installation process without problems. I entered the following commands at the prompt.
dsl 2
cfdisk
The first command boots DSL into runlevel 2, which is essentially text-only mode. The second starts the cfdisk partitioning utility provided with DSL. You should note the path to each partition (e.g. /dev/hda1) so you can assign to them the correct file systems. I've read that 128 or 256 MB is the accepted size for a swap partition these days. The standard installation of DSL doesn't exceed 50 MB in size, so 80 MB seemed reasonable for the bootable ext2 partition. I allocated the rest of the free space to the partition that would contain my home, etc and opt directories.
The partitions also needed to be formatted.
mke2fs /dev/hda1
mke2fs /dev/hda3
mkswap /dev/hda2
swapon /dev/hda2
Then I rebooted to make sure the partitioning and formatting held. After that, it was just a matter of running the installer.
cd /usr/sbin
./frugal_install.sh
You can enter
home=hda3 etc=hda3 opt=hda3
when prompted for additional installation options to put those directories on a separate partition, as I did.
Everything from there proved to be a straightforward Linux installation. But I must say that a 100-MHz Pentium processor and 48 MB of RAM just aren't cutting it, even for such a lightweight distro. I suppose I could always use the box as a mail server or a hardware firewall. Both seem rather unnecessary for my computing needs, though. I imagine I'll find something to do with the old beast eventually.
Wednesday, November 09, 2005
Totem Mozilla Plugin Unplugged
Since upgrading to Ubuntu Breezy 5.10, I found that video was broken in Firefox. I initially installed the MediaPlayerConnectivity extension I had used with Hoary 5.04 and disabled the Totem plugins for all video file formats. This worked well enough for everything except the trailers on Apple's web site. I suspect they're using the most sophisticated/"fancy" features of QuickTime, which causes Totem Mozilla Plugin—despite being disabled—to totally flip out and crash the browser. The Firefox UI doesn't provide any obvious way to uninstall the plugin, but it can be done. Here's how.
cd /usr/lib/mozilla/plugins
sudo rm *totem*
or, alternately
sudo rm -rf *totem*
I'm always wary of using forced recursive removal. I wouldn't recommend the second method, especially since the first seems to work equally well.
This should delete all files associated with Totem Mozilla Plugin. If you really wanted it back, I suppose you could reinstall the Firefox package. (You might have to use the one included on the Ubuntu installation CD.) The next step is replacing the Totem plugin with something else. The MPlayer plugin has improved considerably since Hoary, so that's what I'm using. The package is called mozilla-mplayer.* I opted to remove mplayer-386, which Synaptic will install by default, and replaced it with mplayer-nogui. I didn't want MPlayer cluttering up my Applications menu. I already had the necessary codecs installed because of xine. If you get a missing codec(s) error, you might have to download them from the MPlayer web site. Now everything works beautifully. Embedded media is a sweet, sweet reality for me.
* If I remember correctly, it's part of the multiverse repository. I can provide detailed instructions on how to enable repositories upon request.
cd /usr/lib/mozilla/plugins
sudo rm *totem*
or, alternately
sudo rm -rf *totem*
I'm always wary of using forced recursive removal. I wouldn't recommend the second method, especially since the first seems to work equally well.
This should delete all files associated with Totem Mozilla Plugin. If you really wanted it back, I suppose you could reinstall the Firefox package. (You might have to use the one included on the Ubuntu installation CD.) The next step is replacing the Totem plugin with something else. The MPlayer plugin has improved considerably since Hoary, so that's what I'm using. The package is called mozilla-mplayer.* I opted to remove mplayer-386, which Synaptic will install by default, and replaced it with mplayer-nogui. I didn't want MPlayer cluttering up my Applications menu. I already had the necessary codecs installed because of xine. If you get a missing codec(s) error, you might have to download them from the MPlayer web site. Now everything works beautifully. Embedded media is a sweet, sweet reality for me.
* If I remember correctly, it's part of the multiverse repository. I can provide detailed instructions on how to enable repositories upon request.
Subscribe to:
Posts (Atom)